Welcome!

My name, Karin, was pretty common when I was growing up...just not the spelling. Unless you are of German heritage like I am. So, I have spent my entire life answering the question, "What is your name"?... With, "Karin...with an "i"! Who knew it would come in handy all these years later when I went to name my blog.
Showing posts with label Hostess Gift. Show all posts

Friday, February 25, 2011

InStyle Stamps Blog Hop

Hi Everyone,
It's the last Friday of the month and that means it's time for a blog hop brought to you by the DT at InStyle Stamps.  Ready for some cute projects and lots of crafting inspiration?  You should have arrived from Kimme's blog, but if you didn't, just see the list below.  Leave some comments along the way and make sure you end up at the InStyle Stamps blog, they will have all the fun details there.

The theme is friendship, so I used this darling little Patty from the set Patty's Pretty Poises for my Post it note holder.  I bought these mini pens from the $1 spot at Target and they were a perfect fit for this gift item that's a perfect fit for any purse.


Next stop on the hop is Cathy...I know her project is a must see!

Karin (You are here)

Details-Paper: The Paper Company, KI Memories, Copic Markers in the following colors: C1, BG02, BG10, YG03, YG11, Y21, E31, E33, RV23, R85. Felt Butterfly: Michaels, Ribbon from my supplies.


Thursday, December 23, 2010

More Holiday Tags

Hi Everyone!

I'm back this week with some more tags.  I apologize to Lindsay and my Lindsay's Stamp Stuff  design teammates for totally messing up last week.  Everyone did the fun packaging post, and I was off a week and posted some tags.  Well, that just means more tags for you this week.

This first tag is on my jar of homemade cocoa.  I used the cocoa packet image from the set Warm Winter along with a piece digi paper from the Shabby Houndstooth Paper Pack on the tag here:


And yes, my favorite go to round label for the top :)


Here is a peek at both of the sets:


These next tags are crazy simple.  I like to have a small treat at every one's place at the dinner table, and I'm super low on time this year.  So I used a label from my favorite LSS Vintage Christmas Labels set.


I printed it out in red and then used the largest Nestie to cut it out.  It left a nice wide border around the image, so I didn't have to layer it on another piece of paper.  Then I added the HO HO HO to the center.  This was printed out separately and added on after I used a circle punch to cut it out.  A slit on the top and bottom to fit the candy can through and I was done.

Her is is at my place setting.


A wider shot of my Christmas table.


And a closer shot of the lovely arrangement that was a gift from my Aunt Inge this year.


Thanks for visiting today and be sure to see what tags Lindsay and the rest of the team have to show you this week.

Lindsay (Owner and Designer)
Cheryl (DT Coordinator)


Challenges these projects are linked to:
My Grafico-Christmas

Tuesday, November 30, 2010

Ornaments


Hello Everyone!

The past couple of weeks, I have been helping a friend make ornaments for an event at her church.  These are no where near all of them...(literally numbered in the hundreds) but these are two of the papers she chose.

I thought they came out super cute, so I decided to make some for my friends and family and I used a cute snowflake image from the set Warm Winter by Lindsay's Stamp Stuff.


To make these, you will need:
2 strips of patterned paper 12" x 2".
Score each piece of strip at 1/2" all along the 12". Then fold accordion style.
Use sticky strip tape to adhere the 2 pieces together, inserting a piece of string at the top for hanging.
I used a dab of hot glue in the center of the rosette to hold it together and then just embellish as you wish.

The center circles measure 1 3/4" and 2" and the snowflake is embellished with a rhinestone and some glitter.

So, have you started making anything for Christmas this year?  I would love to know. 
Thanks for visiting!

Challenges this is linked to are as follows:
Crafty Pad-Snowflakes
I Did It Creations-Surprise Me
My Grafico-Christmas
Scrappy Frogs-Christmas
                                                                Crafty Catz-Christmas
Mami Doodles-Gift Item
Hodge Podge Shop-Anything Goes
Fresh Brewed Blog-Winter or Christmas
Inktegrity-Anything Goes
Simon Says Stamp-Let it Snow
Creative Belli-R is for...(Rhinestone and Red)
Fab n Funky-Anything Goes
Scrapbook Sisters-Let it Snow

Details not listed above-Paper: GP White, Heidi Grace, Punches:Marvy, EK Success, Stampin' Up, Ink:Stampin' Up, Stamps:PTI, gems from my supplies


Wednesday, November 3, 2010

An iPaper Pumpkin A.K.

Hi Everyone!

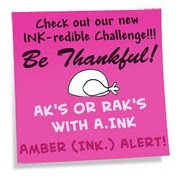
The new INKcredibile Challenge is in full swing and I finally have my entry completed.  Yay! 

The challenge is to make something for someone you don't know, and give them a little R.A.K. Or if you prefer, and A.K (Act of Kindness) if it's someone you do know.  Isn't that a sweet idea?  So great at this time of year when we have loads to be thankful for. 

Even though Halloween is behind us, that doesn't mean we have to leave pumpkins behind just yet.  I know it seems that we go straight from Halloween to Christmas, but I just adore all the colors and smells of fall.

So with that in mind, I decided to use some iPaper and make a little paper pumpkin and pair it with some candy kisses as a gift for my cousin who will be hosting Thanksgiving dinner.


I printed out this pattern School Girl Plaid-Goldenrod and then sent it though my printer again, and printed a coordinating pattern (Earthy Tartan) on the other side.  I doesn't show up in the photo, but I didn't want it to be white on the inside.

To make the pumpkin, you will need 11 strips of paper 1" x 6" with a hole punched at either end of the paper.  Then just run a ribbon through one end and knot it.  Run the ribbon through the other end, leaving a small piece at the top for a stem.  Then fan out the papers and add paper leaves.

I wanted to show off the shiny kisses in all their autumn glory, so I packaged them up in a clear box with a ribbon that had gold accents.

I used a scrap of the Earthy Tartan for my tag and the leaf image is from the stamp set Fall in Love.
Thanks for visiting the blog today and I hope you are inspired to do something kind for someone during this season of thankfulness:)

Other challenges this is linked to are as follows-
Aud Sentiments- The word Thanks
Crafty Emma-Chocolate-Carmel
Crafty Cardmakers-Digital Plus
Cupcake Craft-Thank you with Atumnal colors
Scrappy Frogs-Give Thanks
Tuesday Throwdown-Give Thanks

Details not listed above-Paper: The Paper Company, Ink: Stampin' Up!, Stamps: Stampin' Up!, Nesties, Paper Crimper, Ribbon and rhinestones from my supplies.

Saturday, December 19, 2009

Christmas Tags

Hey there!


This is a quick post of more PTI tags that I have used on, and for EVERYTHING this year! I sure got my moneys worth out of this set of stamps. This happens to be a gift of handmade tags that is going in a bag with the Spice Mix and Snowman Soup from the last post.


The box instructions were copied down from a blog last summer, but I have seen instructions for the same or similar box over on SCS. I made a cover for the box using a piece of acetate, but it was giving me a glare in the photo. I do have one though, I promise.


These were simple to make, but a bit time consuming. I suggest making these in July, and keeping them for the holidays, so you aren't a crazy woman at this time of year. Just a little tip from me to you.


Hope all your holiday prep is on schedule!


Details-Paper: Office Max, Bazill, Stamps:PTI, Ink: Stampin Up, Twine from an unknown source.

Thursday, December 17, 2009

Christmas Gifts

Hi Friends,


Here are some more of my homemade gifts that I plan on passing out this year. This is my Snowman Soup ( Hot Chocolate ) and I used the templates from Nichole Heady's blog for the hanging tag. The top of the containers are embellished with a snowflake from my PTI holiday tags set.

This is the cocoa recipe that I used :


10 c. dry milk powder

4 3/4 c. confectioners sugar
1 3/4 c. unsweetened cocoa

1 3/4 c. non dairy creamer


Mix 3/4 c. boiling water with 1/3 c. mix. Enjoy!


This Chili Spice Mix was a last minute addition to my gifts. My sweet blogging friend and design team mate, Cheryl , turned me on to this site here , and that is where the idea came from.


They even had a link to these cool tags for the top!


Thanks for visiting and I hope this helps someone for a last minute gift idea!


PS- Keep in mind that the sale is still going on over at Lindsay's Stamp Stuff. Stamp sets are still Buy 2 Get 1 free until December 23rd!

Details not mentioned above-Ink: Stampin Up, ribbon from my supplies.

Wednesday, November 25, 2009

Tea Box with Mini Notes and a Tag

Good Evening Everyone!


It's the 25th of the month and that means it's time for a Papertrey Ink Blog Hop! Yay! The theme of the hop is quick wraps or tags, so I am showing off one of my Tea Boxes I have made for gift giving this holiday season. I used my Cuttlebug and the Tea for Two set to decorate my box. To keep things simple, I stayed with a monochromatic color scheme of navy and white, which provides a clean , crisp look.


This is the view from the top...


And these are the simple tags I used to complete the wrapping in a simple cello bag. Just a quick stamp, and cut out with my Nesties (Labels 4) and the package is complete!


This photo is the back of the box, showing off the mini-notes and envelopes I included to make this gift more complete. As you can see, they are a simple stamped image on a card that is 3 3/4" x 2 3/4".

I hope this reminds everyone that not every card, wrap or tag has to have tons of layers or embellishments to make a beautiful gift and presentation.


Thanks for hoppin' by!


Details not mentioned above- Paper: Bazill, Ink: Stampin' Up!, ribbon from my supplies


Wednesday, November 4, 2009

Fancy a Cup?

Happy Hump Day!

I'm so excited about my blog post today.


I love when projects come together easily and that's what happened when I started using these new digital image stamps from Lindsay's Stamp Stuff. I received a set of coffee related ones (I happen to looove coffee!) and I got to thinking about creating gift giving items for the holiday season.


The shape of this coffee sampler from my pantry, reminded me of the 2-5-7-10 Treat Boxes I have been making for my craft fair,


and these images are exactly what this gift needed. (The 2-5-7-10 numbers refer to where the paper is scored to create the box itself.) The coffee fits inside perfectly!


I adore this polka dot mug with the sparkly steam!


Now, what about that gift card in the first photo? Well, I used the Mojo Monday sketch for this week to create the layout, and another darling image and sentiment from the Coffee Talk set. However, I can't just put the gift card inside loose... (especially when the recipient knows I am a card maker!)


So, inside I made a pop up pocket! How cool is that?


I found these digi-stamps so fun to work with because you can adjust the size of the image to your card or 3-D item. I love the cute cream and sugar bowl...which of course just called out for some bling! LOL. The open lines make it easy to color these images and tailor them to a specific individual, project, or holiday. Fun!


I would be thrilled to receive this for Christmas! Don't get me wrong, I love "stuff", my house proves it, but I am to the point of really appreciating a consumable item.


Add a hug, kiss and "I love you" along with this, and it's pretty much the perfect gift!


Details-Stamps:Digi Images from Lindsay's Stamp Stuff, Paper: Bazzill, American Crafts, Markers: Bic Mark-Its, Sugar Loaf markers, Die Cuts: Cuttlebug, Nesties, Metal Stickers: Mark Richards, ribbon from my supplies.


Tuesday, October 20, 2009

Mummy Votives

Good Morning!

This is not a card, but I made these after seeing something similar at the craft store around here.

I made them before vacation, and they have been on my table ever since...So cute!!!!

I used gauze torn into strips and wrapped it around two old votive candle holders I had. After securing it with glue, I took a brown ink pad (don't remember which brand!) and scummed up the material to make it look aged. I bought googlie eyes and used a glue dot on those to secure them. The craft store used tall cylinders for these, but I had these votive holders on hand and thought I would recycle, so in this case I am using the battery operated tea lights for safety. Thanks for the drop by and hopefully I will get to posting new stuff later in the week!

Wednesday, September 2, 2009

Chip Clips

Happy Wednesday!


I have been hanging on to this empty Altoids tin for a long time, waiting for some sort of inspiration. I knew it had to be good, because they no longer make these tins with a flat lid. Total bummer if you ask me!


Well, since I am cheap, I mean thrifty, I never by Chip Clips. I always use binder clips or clothes pins. Well, guess what fit perfectly into this tin...?
Pretty neat! I couldn't leave them plain since I was making them for a gift, so I matched them to the outside of the box. I used patterned paper and Modge Podge on the tin and the clothes pins...


and then decorated the lid with ribbon. I added a shabby chic flower I made using a brad, small flower, and a scallop punch. I printed the words out from my computer. (See top photo.)


Hope you liked this slightly unconventional idea! Have a great day!

Details-Paper:DCWV, Accessories: Brad: JoAnn's, Small flower: Dollar Store, ribbon from my collection.

Edit:Entered into Artful Inkables challenge...


Saturday, August 29, 2009

More Wine Tags

Hi !


I thought I would show you a better photo of a couple more Wine Tags with more specific information. It wasn't clear in the post a couple of days ago about how the tags slipped over the neck of the bottle. The tags are 4 1/2" X 11", with the score line at 2 3/4". The 2 3/4" portion has the hole punched in the center using a 1 1/4" punch and then decorated using a scallop punch.


The top part of the tag has the corners rounded too. Then just decorate as desired!


Thanks for dropping in today...


Details-Stamps: Stampin Up, Studio G, MSE, Ink: Stampin Up, Accessories: Nesties, ribbon and rhinestones from my stuff...

Thursday, August 27, 2009

Wine Tag

Good Morning everyone!


This is an example of of the Wine Tags I am making for the fall craft fairs. An excellent alternative to the typical bag, they simply slip over the neck of the bottle. Being that they were big sellers last year, I am once again making a variety, including Thanksgiving and Christmas themed tags. Thanks for looking and hope you have a happy day!


Details: Stamps: Studio G, MSE!, Stampin UP!, Paper: Joann's, Ink: Stampin Up!, Ribbon: from my stash of supplies

Friday, August 21, 2009

My Very Own Tea Box

Hi all!

I was So excited when I came up with this idea of making a tea box to hold the Celestial Seasoning tea packets...I came up with the dimensions myself (Woo Hoo!) and decorated the box. Isn't it cute??!

I know it's not fancy, but I really liked the simplicity and gift giving/craft fair potential. Then it hit me, and I realized Stampin Up sells a die for the Big Shot that makes a box that looks like this! (Called Box #2) So much for my original idea! Oh well, I still like it. I am not sure exactly how large the Box #2 ends up being when assembled, but mine is made from a 12x12 piece of card stock. The approximate finished dimensions are 5 1/2 L. by 2 1/2 w., by 3 1/4 H.

Here it is with the tea bags inside. If you would be interested in a tutorial, leave me a comment and I will try and make one if there is enough interest. (That would be another first for me!)


Once again, thanks for visiting and for all the kind words from everyone. Have a great weekend!


Tuesday, August 18, 2009

Three Little Mini's

Today's offering is that of a mini note card. I am packaging them in sets of eight for the craft fairs. I made these clean and simple to prove a striking card isn't all about tons of layers and embellishments. One embellishment (rhinestone here)...

or even none, can still have visual impact. These are perfect for gift giving as a set, or...
attached to a gift at Christmas time! Thanks for visiting today, and since it is still summer (not that you can tell by my fall/Xmas cards!) I will leave you with...

some pretty flowers from down is Amish Country...Have a good one!
PS. All stamps used today are Stampin Up, except for the filigree tree, that was from Carlton Cards.


Related Posts with Thumbnails