Welcome!

My name, Karin, was pretty common when I was growing up...just not the spelling. Unless you are of German heritage like I am. So, I have spent my entire life answering the question, "What is your name"?... With, "Karin...with an "i"! Who knew it would come in handy all these years later when I went to name my blog.
Showing posts with label Masculine. Show all posts

Tuesday, February 13, 2024

Howdy Valentine

 Hi Everyone, 

I made this valentine with my sweet 9-month-old great nephew in mind, because I'm in the baby-sitting rotation now that my niece has gone back to work.  I imagine he'll look like this cute fellow in a short couple of years.  Until then he's an adorable, chubby little cherub that refuses to nap unless I hold him the whole time.  While I'm enjoying the baby snuggles, my arm is usually asleep when he wakes up ;-)

Anyway, I colored up the cute Saddle Up Cowboy and made some valentine themed patterned paper, using the Silhouette Love Heart and Small Silhouette Heart stamps.  


I attached those elements to an embossed heart background and added the Howdy Valentine sentiment, embellishing it with a fussy cut cowboy hat, from the 4 in 1 Cowboy Gear.

Here's hoping you're ready to celebrate tomorrow!  
Karin


Tuesday, May 9, 2023

Fishing Birthday

 Hi Everyone,

I love how happy this Proud Catch Fisherman looks when it comes to his big catch, so I thought he would be perfect for this new  O-Fishal Birthday Greeting!

The greeting and image do most of heavy lifting when it comes to making a cute card, so I simply made a background using Vicki's Versatile Background and Sand Snow Water Lines, using blue and green ink.


The black strip was embellished by me adding a few doodles and the Big Mouth Bass was fussy cut and added with pop dot.

Here hoping YOU have a REEL-Y great day too!

Karin


Tuesday, April 18, 2023


  Hi Everyone,

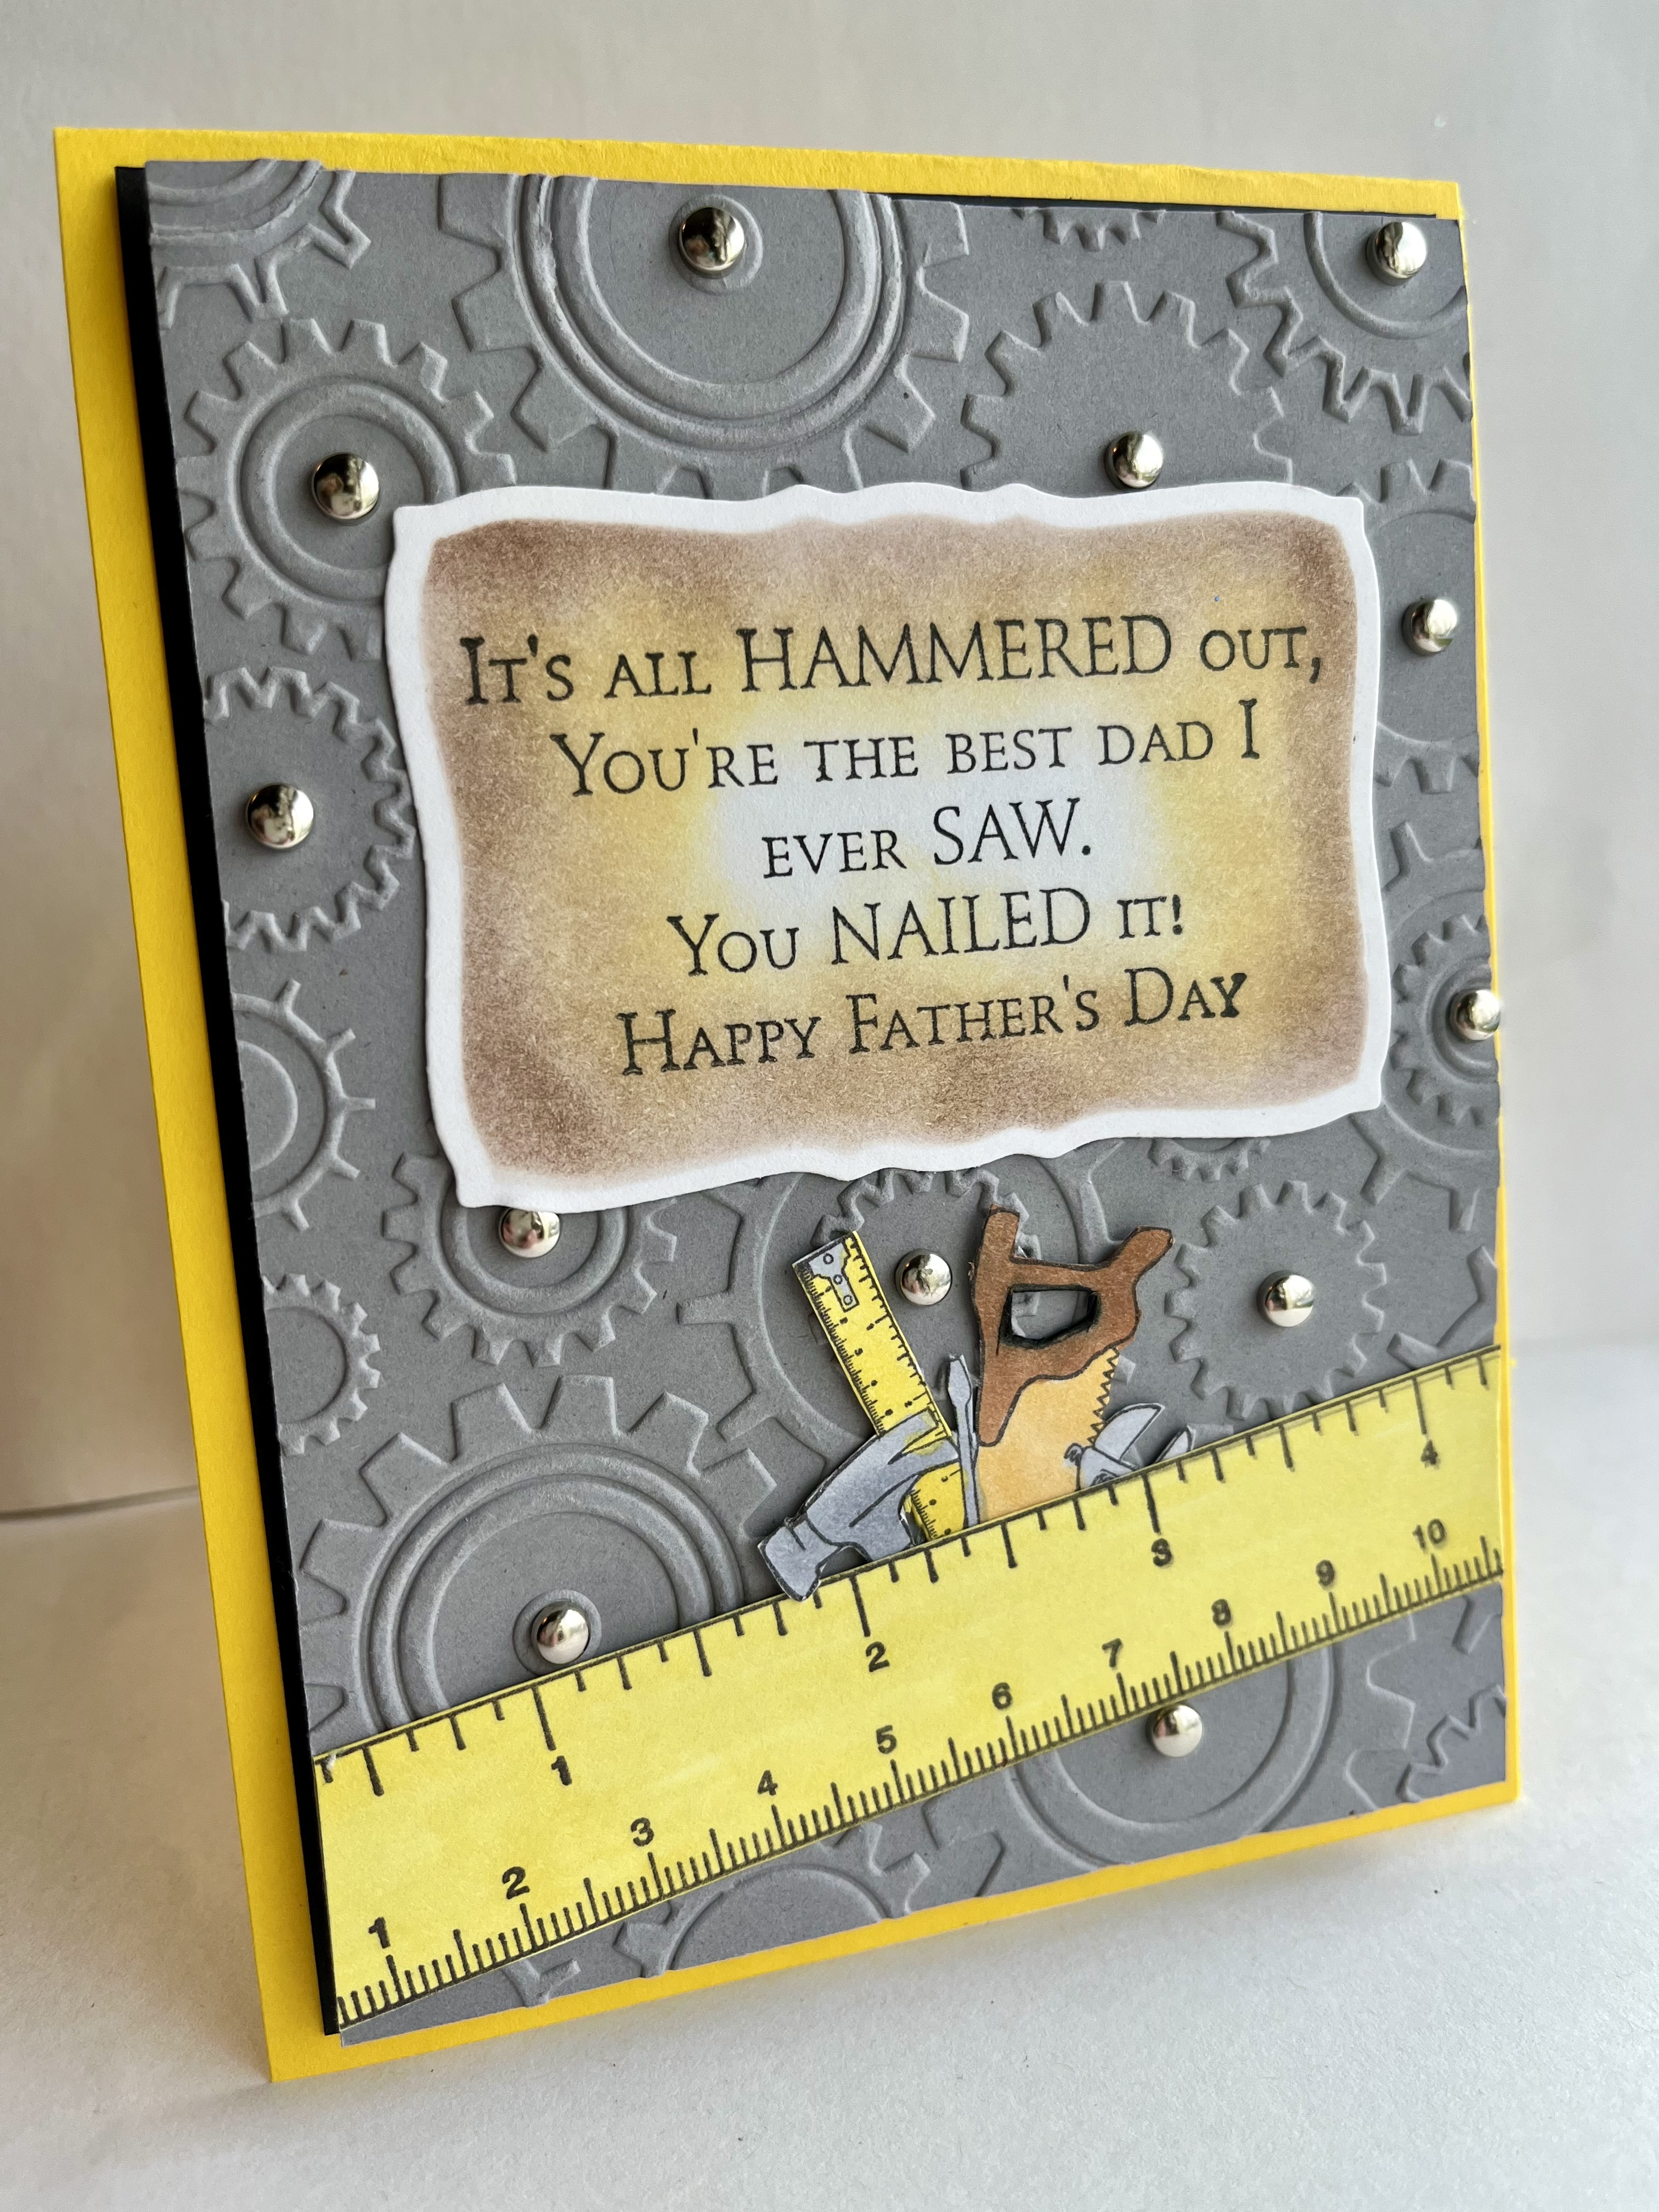
I'm a little early with my Father's Day card share, but if you love the fun greeting, this gives you plenty of time to order it for your own stamping!

The Nailed It! Father's Day Greeting is perfect for those handy dads out there.  I really respect and appreciate the folks that have that specific know-how, because that isn't me at all!  


I stamped and die cut the sentiment, adding some sponging to match the base and Ruler.  I decorated the embossed gear themed background with some metal brads and added some tools that were fussy cut from the Tool Christmas Stocking to finish it off. 

Lots of fun new stamps were recently released and you can find them all right here!

Happy Stamping!

Karin

Tuesday, November 2, 2021

Ugly Christmas Sweater


Hi Everyone,

DRS Designs has released lots of great holiday stamps this past weekend.  If you are behind in your holiday stamping,  (Me, me! I'm raising my hand along with you...) the stamps on my first card are sure to jump start your mojo. 


This one features Ugly Christmas Sweater Designer.  It's a group of stamps that includes a sweater, some stitching lines along with 3 tiny images for the sweater!  I mean, it was the first thing I wanted to ink up when I opened my new stamps, because it looked like so much fun.  I'm not sure what this says about me, but I would wear this blue and red candy cane sweater unironically.  It's sooo cute!  Anyway, you can make yours any color and set comes with a string of lights and a gingerbread man too.


Also available is a matching Ugly Christmas Sweater Greeting, which was a must have to go with all the sweaters I'll be making.


Everything was layered onto a background made by sponging over a die cut snowflake, along with a snowflake border made using Interlocking Snow Background stamp.


A couple of punched snowflakes embellished with gems finished it off.

This card was a quick masculine birthday card I made for a friend.  No frills,  just some good old stamping, some Stickles to enhance the beer foam, and a few metal brads :)


The stamps used here are as follows:


Don't move on until you've clicked on over to see all the new stamps at DRS Designs!  


It's almost the holiday season, so don't be caught unprepared :)


Have a great day!

Karin 

Tuesday, June 15, 2021

A Friendly Note and Father's Day

                                                                           Hi Everyone,


I have a couple of cards to share today, one for a friend and one for the dads.

I chose the Happy Mail image to pair up with the new Friendly Note Greeting, because the flower is cute and friendly!  The image comes with the words thinking of you on it, so I just masked them off, inked up the stamp and then removed the tape before stamping it, so that only the image remained. 

The card base and the yellow layer were stamped using the Puff Circle, and the orange layer was dry embossed.  My die cut grass was stamped using the Easy Grass Background and it was attached at the end of assembly along with the greeting.


This one is for all the golfing dads out there, and that includes mine!  

The background was made using an embossing folder and the Everything Golf Background.  I covered up the seam between the two papers with a strip of black cardstock and embellished it with a couple of metal brads.  I used the Especially Fore You Greeting and attached it to the card base.  For the image, I stamped and heat embossed the Silhouette Male Golfer, and used some post it notes to mask off the background, as I added ink to create the grass and sunrise.


Thanks for visiting the blog and visit DRS Designs for all of these stamps and more! 

 For those celebrating, have a happy Father's Day!  And for those who are missing someone, may the day land gently for you.  

Hugs,
Karin


Tuesday, May 18, 2021

Fishing Cards

 Hi Everyone,


In honor of Father's Day, I decided to try my hand at making a fishing vest card.  Since I know zero about fishing, I Googled a fishing vest and tried to use what I know from making one of those dress shirt cards.


I began by cutting the paper into 4 1/4" x  8", scoring along the 8" side at 2" in on each side.  That created the flaps going to the center, and the math was much easier. I used a corner punch on each side, and along the bottom inside flaps and folded down the collar.  I stamped it using the Splatter Background stamp and used my tag punch for the pockets.  I added some stitching marks to those by hand, and then went along the edges with some green chalk. 


Along with adding the greeting, I filled the pockets using some twine and fussy cut fish. I think the real fishing vests my have a zipper up the front, but I embellished with buttons.


The stamps used are:


Best Fishes Hook


3 in 1 Ocean Floor Designs


Big Mouth Bass


For my second card, I tried to keep my stamping to neutral, masculine colors.  I stamped and die cut the Fishing Square, lightly adding color and some sponging.  I attached it to a dry embossed background, which had an attached a piece of matching patterned paper, made using the Splatter Background stamp.


The sentiment is a portion of the Fishing Birthday Greeting and I finished it off with three metal brads.


Thanks for visiting and be sure to check out all of the great new stamps at DRS Designs!
Karin


Tuesday, May 11, 2021

Masculine Birthday Cards

Hi Everyone,

Now that Mother's Day is behind us, I have a couple of cards to share for the guys in your life today.  DRS Designs has really come in strong this month, releasing all kinds of stamps for the fishing and billiard enthusiasts in your life!

I paired the new Fishing Birthday Greeting with the Proud Catch Fisherman image stamp, which I layered onto a background stamped using the Splatter Background stamp.  In keeping with the masculine and fishing theme, I wrapped that background with some matching twine and netting.


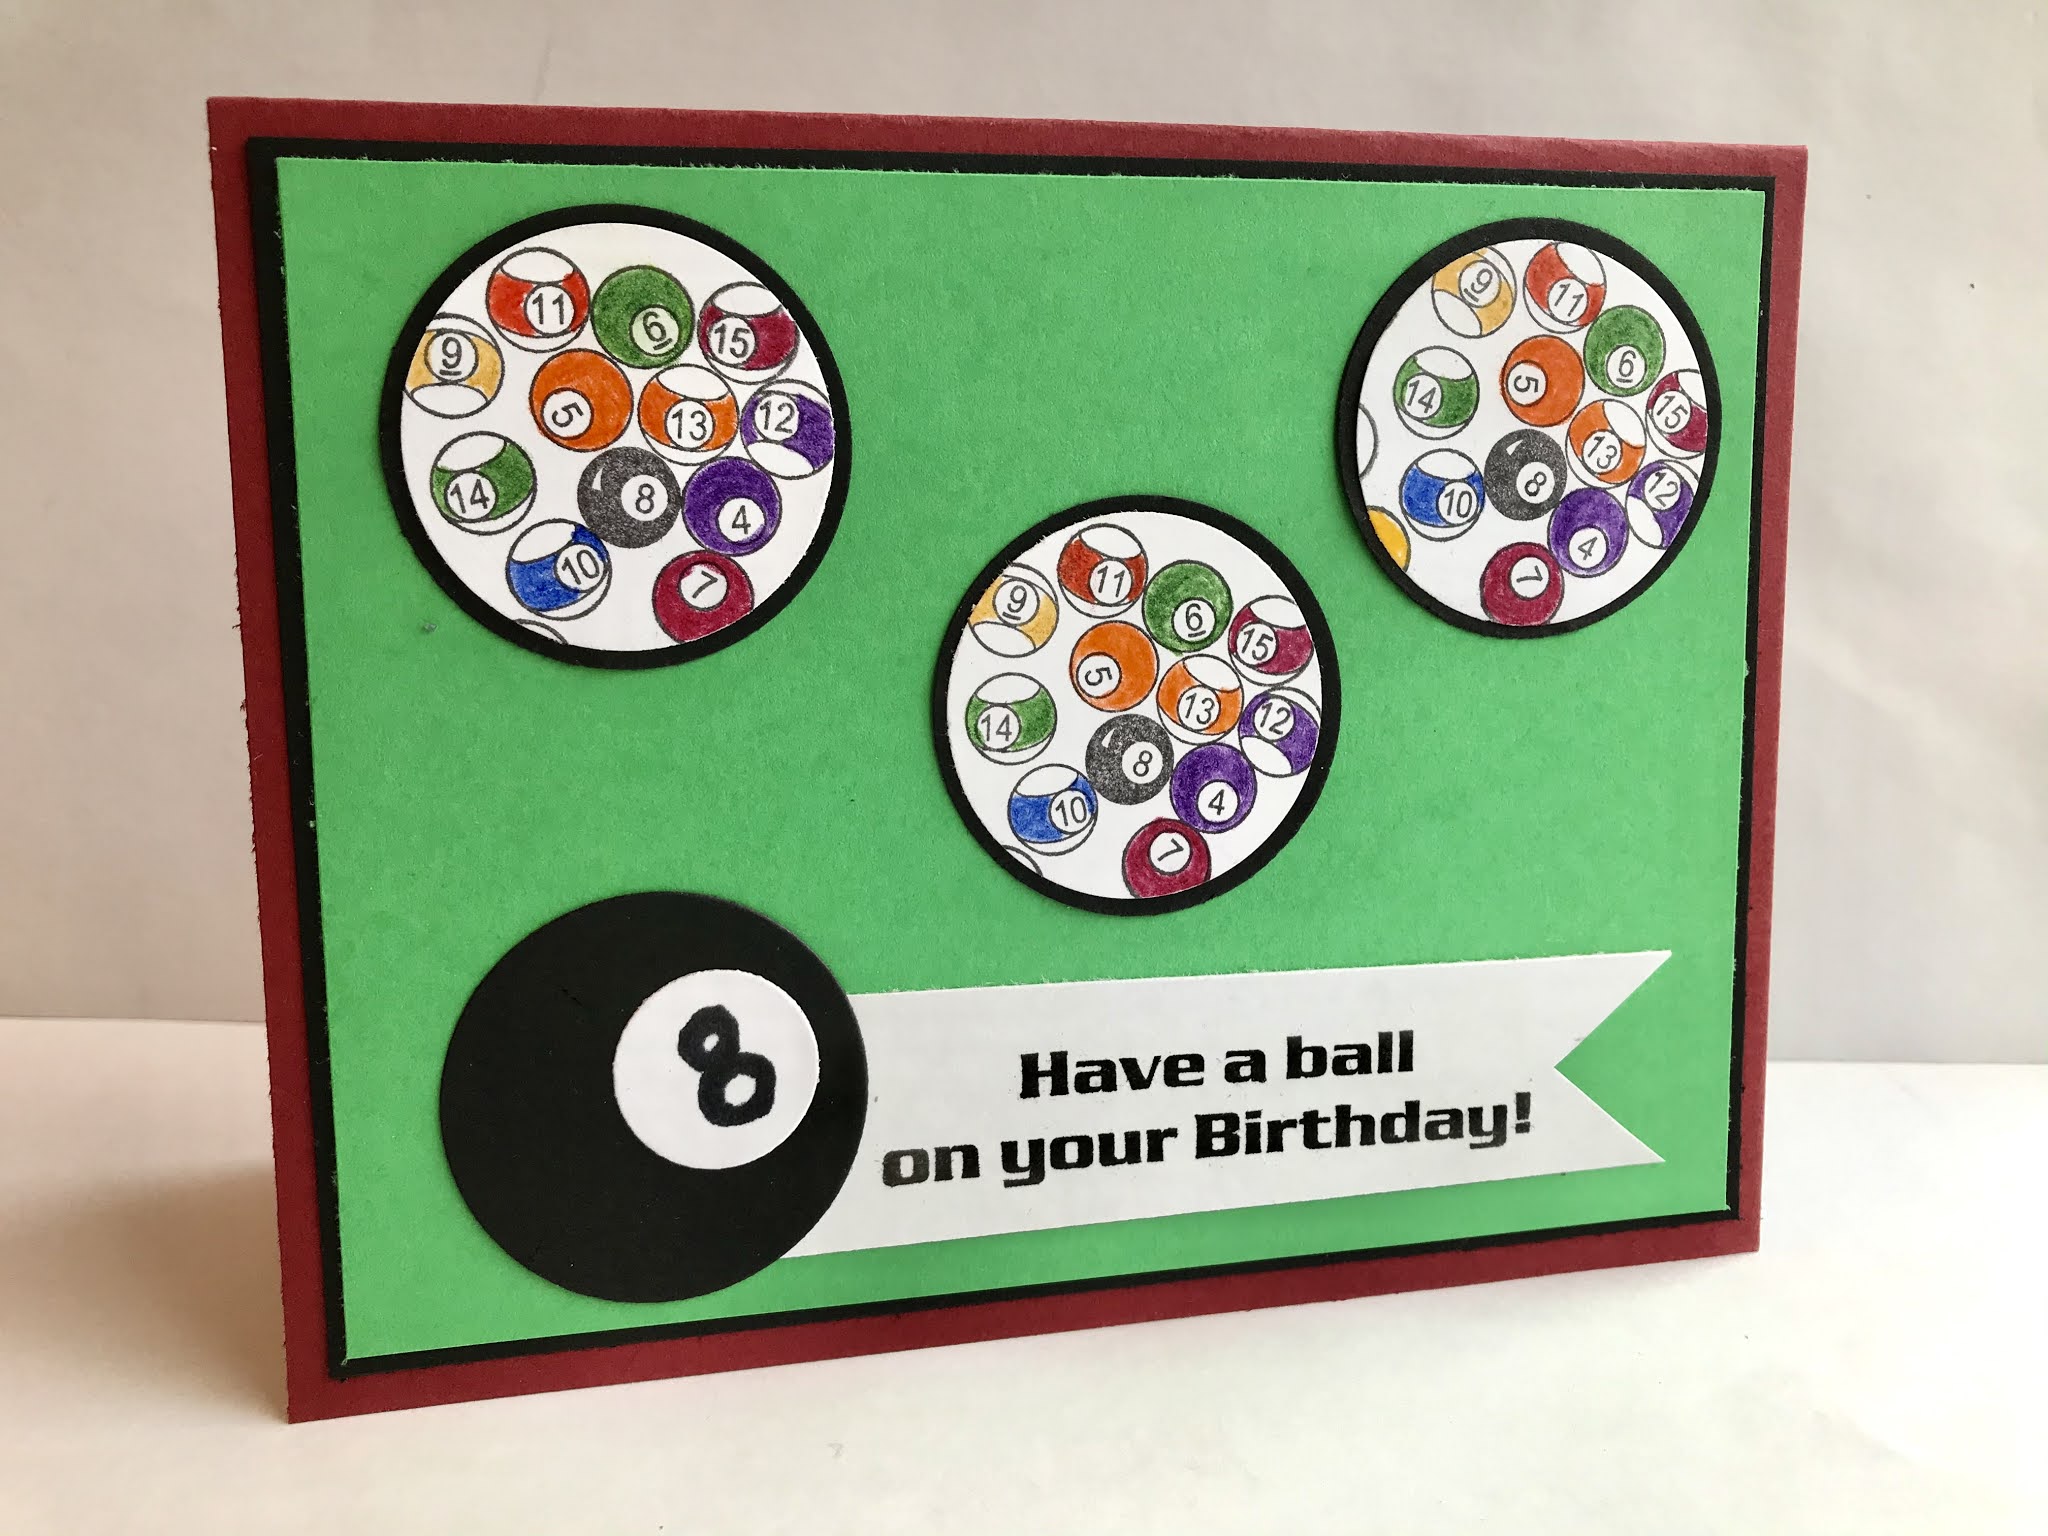
Here I stamped, colored and punched out the Billiard Balls using circle punches, to keep with the whole ball shaped theme on the card. To embellish the Ball on Your Birthday Greeting,  I made an eight ball out of punches, and hand drew the number eight. 


Thanks so much for stopping by and I'm wishing you the loveliest of days!
Karin


Tuesday, May 4, 2021

Best Fishes

 Hi Everyone,


Boy this looks like a rainy week for me, which isn't bad news, because that just means more stamping time for me!  


Masculine cards are always a challenge for me.  I usually go for neural colors or a pairing of orange and blue, like I did below.  I sponged a sky and also sponged the water, using some sticky notes, a scallop punch to aid me along. The photo makes the water look more splotchy than it does in real life, and I'm not sure if the gel pen waves show up to well either.  You'll just have to trust me on that. 


I stamped and embossed the Silhouette Fishermen and also stamped the Best Fishes Hook, coloring in the hook with a sliver pen, to give it a look of metal.  I then paper pieced the actual phrase on top. The two fish were stamped a colored using Copics and a bit of that white pen again. 


The fish came from these 2 stamps:


3 in 1 Ocean Floor Designs

4 in 1 Ocean Designs


Here's a card from the previous release that I forgot to share here on the blog.  This one is the opposite of masculine, but it's pretty simple in it's design as well.


I stamped the birds multiple times, and wrapped the panel with the ribbon, before attaching the sentiment, which was die cut.


 The stamps I used are:
Flowering Bird Branch  
His  Blessings Faith Greeting


 I then added a big gem embellishment to finish it off.
Thanks for visiting today!
Karin


Tuesday, April 27, 2021

Billiards Anyone?

  Hi Everyone,


It's been ages since I played a game of billiards!  During high school I babysat for a family who had a pool table, and their son always wanted to play when I came over to sit. I'm pretty sure it's because he knew he could beat me :)  These new pool themed stamps brought back all sorts of memories for me and I couldn't wait to create and share a couple of cards with you today.

The first thing that came to mind when I saw these stamps, was the green felt on top to the pool table. I didn't have any felt to add to my project, but I did have some green sparkly flock, so I tried to make my card resemble a pool table. I used a corner punch and a circle punch for the corners and two long sides before spraying my cardstock with adhesive, and covering it with the flock.
I stamped colored and fussy cut the Pool Cue, Ball & Rack and attached them along with the new die cut Billiards Birthday Greeting.


For this card I began by stamping a bunch of the Billiard Balls,  and then realized I needed to Google how to color them up!  They were pretty colorful in the end, so I only added a banner with the Racking Up Birthday Greeting on it, and a few star shaped gems for pizzazz.


Be sure to visit the DRS Designs new releases page for these stamps and much, much more!  

Happy Stamping!

Karin


Tuesday, April 13, 2021

Peep, it's Spring!

  Hi Everyone,


I love this darling little Chick in Nest stamp, and while it's great for Easter, it makes for a great spring time hello card too.  

I attached it to a background of embossed chicken wire and a stamped Checkerboard Background in yellow ink. I covered up the seam using some lace and burlap trim, embellishing with a pre-made yellow flower.


The peep greeting was made using only the word peep from the Favorite Easter Peeps Greeting and a word bubble punch.

For my scene on this card I stamped Frog Boy Cutie Pie Kid and then masked him off in order to create the sky and river bank behind him.  I wanted him to look like he was standing in the creek catching frogs, so it tried to color over his feet and make the bottom of his overalls darker in color.  I'm not sure how successful I was, but his little face is just so cute!

I stamped the Have I Toad You Greeting by splitting it in half, to fit inside a punch and added the I Love You Greeting, that was also made using a banner punch.  


I remember picking dandelions for my mom as a small child, as a symbol of my love for her.  Perhaps if I was a boy, I may have brought her frogs instead :)  

Thanks for stopping by!
Karin


Tuesday, September 22, 2020

Just a Note

Hi Everyone,

My babbling brook and meadow card is one that can be used for any occasion.  I need to keep those handy for when I'm in a pinch, and this would be one that's gender neutral too.  All I have to do is choose a greeting for inside when the time arrives.

I began at the bottom of my image panel, stamping the River Rocks twice, for either side of the stream.  I then stamped the Tree Line up top. After coloring everything in, and stamping some grass using the Easy Grass Background stamp, I then stamped the Fence Line, finishing it off with a few hot air balloons from the 4 in 1 Sky stamp.  


The 1 Line Just a Note greeting fit perfectly on the bottom.  I'll pretend I planned that out the whole time, but it's nice when things work out in the end :)

Thanks for stopping by!
Karin


Tuesday, July 7, 2020

True Ability

Hi Everyone, 

I realized I never showed off this card here on the blog, so better late than never, right?  

I colored up the Crutch Assisted Man using yellow and blue Copic markers, and then used those colors on my card base and background.  Interlocking Circle and Splatter Background were the stamps I used for my papers, and I added some sponging to the True Ability Greeting after it was die cut.


I used a punch to create the border and added some twine instead of ribbon to finish it off.  Be sure to keep up with the new releases over at DRS Designs!

Have a great day!
Karin

Tuesday, August 21, 2018

Cowboy Hats

Hi Everyone,

I purchased a few new to me embossing folders a while ago, and these western inspired stamps have finally allowed me to use them.  I colored up the Cowboy Cactus image and matched that up with my cactus embossing folder.  The bandana in the image could easily have a paisley pattern, so I made an extra background panel and embossed that too.  


Since the cactus was festooned with assorted cowboy garb, I decided to interpret it,  that the partyers discarded their stuff any which place on their way home :)  I inked up the end portion of the 
Saddle Up Birthday Greeting and used a speech bubble to add to the whimsical nature of the card.  

And I used the beginning birthday part inside, along with the Yee Haw from the 
Western Word Square, adding a couple of saddles and spurs from the 4 in 1 Cowboy Gear.  


I wanted to highlight some of the great phrases on the Western Word Square, so I selectively inked up a few and layered them up using my circle punches. It needed a cowboy element, so I chose to stamp the hat, and added all of them to an embossed mustache background.  


A punched star border was added to anchor the elements and fill in the space along the bottom of the card. 

Yee Haw!  Thanks for stopping by today!
Smiles and Hugs!
Karin  

Tuesday, July 10, 2018

Nautical

Hi Everyone,

While it may not be a challenge for some folks, trying to make a card with a masculine theme always sends me into a tizzy. Things start out well, and then I end up embellishing my card with ribbon or gems, and begin all over again. But... Not today people! I managed to complete what I started, with no glitter in sight :)

After stamping, heat embossing, and die cutting my Sailboat image from DRS Designs, I decided to challenge myself to make some backgrounds for this card.  The first background was made using the 
Large Original Plaid Background and blue ink. By only stamping the plaid one way, it's just stripes!   I made a smaller panel using the same blue in and the Starry Background stamp, and I matted them both using maroon colored paper.


I off set the image panel and added a strip that I made using scraps from my desk and some large brads from my stash.  I added a simple sentiment of "Best Wishes" which came from the larger Engagement Wishes Greeting, and called the card done.  

Best wishes to you and thanks for visiting today!
Karin

Tuesday, May 29, 2018

What's One More

Hi Everyone,

Since I was leaving home for a short mini break last week, I had to make a birthday card on the double and get it in the mail.  Even though my friends and I are of a certain age, that doesn't mean cards can't be fun and cheerful, right?

I chose the One More Candle Greeting from DRS Designs, die cutting it and adding a mat and some sponging.  For all of the fun candles, I used the Girly Swirly Cake and just stamped the candle portion going around the edges of my background.  All that was left to do was color up the candles and make them look festive.


Here is the inside with a few more candles and the two following greeting stamps:


Thanks for stopping by and here's hoping you're living your best life today!
Karin

Tuesday, April 10, 2018

A Couple of Cards

Hi Everyone,

I sure wish these spring time flowers were peeking out in my yard, instead of just on my cards.  I've woken up to snow almost every morning for the past week!  The weather people are promising spring temperatures are on their way, but it can't come soon enough for me.  

After stamping, coloring and fussy cutting the Sneaky Bunny Flower Pot image from DRS Designs, I attached it to some die cut ovals.  I die cut a rectangle to attach the image to, and stamped it using the
Splatter Background stamp, using the colors from the flowers for my ink choices.  The dry embossed  background, and orange strip were also chosen to play off the image and I finished it with the


My uncle has a birthday this week and I was late in remembering to make him a card.  I whipped this golf themed card up on Sunday, and in my hurry to get it in the mail, my photos are a bit haphazard...Sorry!  I kept it monochromatic, and all simple stamping.  No coloring helped make it quick, and I also used the same Splatter stamp for a portion of it too.  (I think I've mentioned in the past, that it's a favorite of mine, perpetually out on my stamping table!)


I split the sentiment, half on front and the last bit inside...


Here are all the stamps used inside and out on this card:

Thanks for stopping by the blog today!
Karin


Tuesday, August 1, 2017

Life is better in Cowboy Boots

Hi Everyone, 

It's been way too long since this cute little Saddle Up Cowboy stamp from DRS Designs saw any ink at my house, so I decided it was high time I make a card using him.  He matched up perfectly with the Better in Cowboy Boots Greeting,  so I stamped, die cut and matted both.  I then colored up that adorable little guy and went to work on my background.

I chose to play off of the the stars on his hat and embossed my papers with 2 different star embossing folders, covering up the seam with a piece of tape that looks like cork.  I dove into my stash of brads and found these little stars. They were however, a bit too small to use by themselves, so I punched out a small circle from a piece of white scrap paper and embellished my embellishments :)

Thanks for visiting today!
Karin

Tuesday, July 4, 2017

Cowboy Boots

Hi Everyone and Happy Independence Day American friends!

While I don't have a red, white and blue patriotic card to share today, what is more American than Cowboys?!  DRS Designs has some fun new western themed stamps being released tomorrow...yay! 

My card features the new Better in Cowboy Boots Greeting (236D), which I stamped and die cut.  I chose to pair it  up with the Cowboy Garb stamp, which I colored with Copic markers and die cut as well.  


The background was made by inking up one side of my embossing folder and running the cardstock through the machine.  I added a strip of paper that I embellished with brads and attached a piece of twine to resemble a lasso, or at the very least, match the rope in the image :)

Be sure to visit DRS Designs tomorrow to purchase all of the new stamps!
  

Related Posts with Thumbnails