Welcome!

My name, Karin, was pretty common when I was growing up...just not the spelling. Unless you are of German heritage like I am. So, I have spent my entire life answering the question, "What is your name"?... With, "Karin...with an "i"! Who knew it would come in handy all these years later when I went to name my blog.

Tuesday, August 31, 2010

Happy Thanksgiving

Hi Everyone!

Happy Thanksgiving...Am I all over the place with my holiday cards or what?  lol 

What I'm really into today,  is not blogging about my cards.  It seems that I'm totally sick of myself.  So, because of that, I have chosen to show off a clean and simple card I made recently using a couple of stamps from Scrolls Work.

This is such a Karin kind of card...I love the colors, the symmetrical look, that fact that it didn't take 9,000 years to make...And how about the little cut-out for the button?  There is nothing that I don't like, that I have decided to duplicate this one when the holiday actually arrives.  Big, happy, contented sigh.
Here are the stamps I used:

Thanks for visiting me and my cards...Have a great day :)

Challenges this card is linked to are as follows:

Sentimental Sundays-Clean and Simple
Pollycraft-Nature
Crafty Emma's Store-Anything Goes

Details not listed above-Paper: The Paper Company, Ink: Stampin' Up, button and twine from my supplies.

Monday, August 30, 2010

Dear Santa

Hi and Happy Monday!

I hope you had a good weekend.  Mine started out great.  Friday night we went to Corleone's for a nice meal on the patio outside.  I had my favorite thing, Chicken Luciano.  Holy cow, read the ingredients.  DELISH!  To be honest though, it may not be my favorite anymore, if I actually tried something else off the menu...lol.  Do you do that?  Get the same thing at certain places when you go eat there?  We don't go to the same place often enough, so when we do, I want what I know will be good.  So predictable.

Enough chatter.  My card today is an easy to mail Christmas card using stamps from Scrolls Work.  This would be a perfect card to mass produce for the holidays.  I stamped the trees three
 times and added the sentiment.  Santa was stamped and cut out with my Nesties and I added a little brown chalk shading. ( I love the vintage look that this Santa has.) So simple to make and a great end result. 

 Here are the stamps I used:

Scrolls Work has some new stamps coming out as well, go here to check them out!

Thanks for starting your week with me...Have a great day!

Challenges this card is linked to are as follows:
Aud Sentiements-Anything Goes
Bunny Zoe-Vintage
Totally Gorjuss-Christmas

Details not listed above- Paper: The Paper Company, Ink and Chalk: Stampin' Up, Punch: EK Success, Nesties and brad from my supplies.

Sunday, August 29, 2010

DRS Designs Day

Hi and Happy Sunday!

It's my day to post over at the DRS Designs blog, so head on over there to see my Christmas card with the funny poem :)
There are also some details on how to win a DRS Designs gift certificate too.

Have a great day!

Saturday, August 28, 2010

Not So Scary Pumpkins

Hey Everyone!

For today's card I used some stamps that came this week from Scrolls Work. Fall is definitely my favorite time of year for making cards.  Even more so than Christmas, and I think it's because I love the fall color palette so much. 
The stamps I used are Pumpkin Set and Scary and they retail for $4.50.  Not each, for BOTH!!! Talk about a not so scary price.

I colored the pumpkins with my Copics and added some brownish colored ink on the panel and background embossing to distress it a bit.  I chose to use some layered flowers as embellishments since the pumpkins themselves weren't so spooky, but kinda funny...lol! 

Thanks for visiting me today! I have a slew of holiday cards to show you in the coming days...Stay tuned :)

Challenges this card is linked to are as follows:

Details not listed above-Ink: Versafine, Stampin' Up, Cuttlebug Embossing folder, Punch: Stampin' Up, Rhinestones from my supplies.

Friday, August 27, 2010

New Amber Ink Challenge Blog


Hi Again!

Did you know that Amber Ink has a new challenge blog?  The challenge started last week while I was away, but the good thing is, each challenge lasts 3 weeks... Phew!  Plenty of time left to join in the fun :) Now that I have passed along my torch, I am free to play along for prizes too! Yay!

The very first challenge issued is to make something pertaining to the theme of "Books".  Now to participate you are required to use one Amber Ink product...Not hard...Have you seen the affordable digis over there? 
I chose to make a bookmark using some of her Wine Spots iPaper.  Now, I did use an image from my stash of Lindsay's Stamp Stuff, but once I put on my thinking cap (remember doing that in elementary school?) I was able to add the sentiment from the set Grow Green.  I feel all creative when I manage to think outside the box and it actually turns out like I hoped..lol!

The perfect thing to add to a teacher's thank you note, don't you think?

Unless you want me to win the prize, put on you thinking cap and join the challenge :)

Other challenges this project is linked to are as follows:
Bee Crafty-Ribbon
Aly's Sunday Challenge-Dots
Crafty Inspirations-Bookmark
Cutie Sunday-Anything But a Card
Stamping for the Weekend-Anything but a Card
Hand Stamped Sentiments-Anything but a Card

Details not listed above-Paper: The Paper Company, Ink: Versafine, Stampin' Up!, Markers: Copic, Stamps: Waltzing Mouse, Ribbon from my supplies.


Thursday, August 26, 2010

Back to School Card

Hi Everyone! 

I'm popping in today with a back to school card that I made for my niece's college care package.  I mention that it will be going in the box itself, that way you won't be wondering what kind of envelope this will fit in.  It is an A2 card, but the pencils that I attached completely throw off the dimensions.  Alas, no worries since it will be packaged up with some goodies.  
 
I used a sheet of digital paper from Lindsay's Stamp Stuff for the background of this card.  It comes in the set School Papers and it really makes the whole card in my opinion.

I love the elementary school like printing on it. Remember trying to print your letters, struggling to get them to look like this? So nostalgic.  Here is a look at the entire group of papers:

The pencils were attached with some sticky tape and the ribbon was ruffled across and adhered with the same thing.  The apples are a traditional stamp, and fit with the back to school/fall theme. 

You might want to grab these papers now, because they, along with everything else is on sale at


Another bit of happy news to share....We have an new member to the Lindsay's Stamp Stuff design team joining us today.  Welcome Laurel!! We are excited to have her as part of our group, so drop by her blog and give her a warm welcome.  Then stop by and visit Lindsay (Don't miss getting your freebie on her blog too!) and the rest of the design team to see what cool things they have been making.


Thanks for visiting today!

Challenges this card is linked to are as follows:
Fairy Fun-Punch it
For Fun-Ribbon
Frosted Designs-Back to School
Incy Wincy Designs-Buttons & Bows (well, my twine is a knot!)
Let's Ink it Up-Yellow on your project (my pencils!)
Little Red Wagon-Back to school
Paper Cutz-Anything Goes
Stamp with Fun-Card for a Girl (It's for my niece)
Details not listed above- Paper: The Paper Company, Stamps: Stampin' Up, Nesties, Punches: EK Success, Ink: Stampin' Up, button and ribbon from my supplies.

Wednesday, August 25, 2010

Joyful Christmas Mouse

Hi Friends :)

I'm finally back to posting some projects this week...Yay!

This Christmas card is made using more of the newly released Christmas stamps from DRS Designs.  They are  Joyful Christmas Mouse and Single Jingle Bell.  Yes, my border of bells is only one stamp.  Neat, eh? 
To make the border, I stamped the bell on a sticky note and then cut it out.  After I folded my card in half, I stamped the first bell along the bottom. I then layered the cut out on top, and stamped the next bell slightly over lapping the first.  I lifted the cut out and put it over the second bell, and continued until my row was complete.  After coloring them in, I cut out the bottom and layered a piece of red card stock behind it, so that it would coordinate with my focal image.  I hope you give this technique a try.

Thanks for stopping by today, and I can't wait to show you what else I've made, so come back the rest of the week too :)

Have a good one!

Challenges this card is linked to are as follows-
Crafty Ann's-Christmas in August
By the Cute and Girly-Animal Antics

Details not listed above-Paper: The Paper Company, Ink: Momento Tuxedo Black, Markers: Copic, Bic Mark its, Nesties and ribbon from my supplies.

Tuesday, August 24, 2010

Birthday Blog Candy

Hi Everyone!

No, it's not my birthday.  Someone else is having a birthday and is giving away this fabulous candy. I am slow in getting things posted to my blog since my little mini vacation, so I thought this might be something you would be interested in winning.  

Just go visit Thanh's blog for all the details.


Have a great day, and with a little luck I will have something to post real soon :)

Sunday, August 22, 2010

We are Back

*Edit to add: To the person (scootsv) who commented on my Over the Hill card and wanted to know where the embossing folder is from, it is Cuttlebug Birthday Wishes by Provocraft.  Hobby Lobby carries it I believe.  Your Blogger profile was not active, so I had no way of contacting you directly.  I hope you see this answer. Thanks for visiting me :)

Hi Everyone!

Did you miss me?  Well, hopefully you didn't even know that I was away from home, seeing that I scheduled a couple of posts showing off some cards while I was away :)  

Rod used up a few more vacation days, and we headed off on a what Bridget Jones would call a Mini Break.  However, not being British, we call it a get away.  

We went for a couple of days of fun in Put In Bay.  It's an island in the middle of Lake Erie and I was only there once, maybe 15 yrs ago, so it was like new to us.  

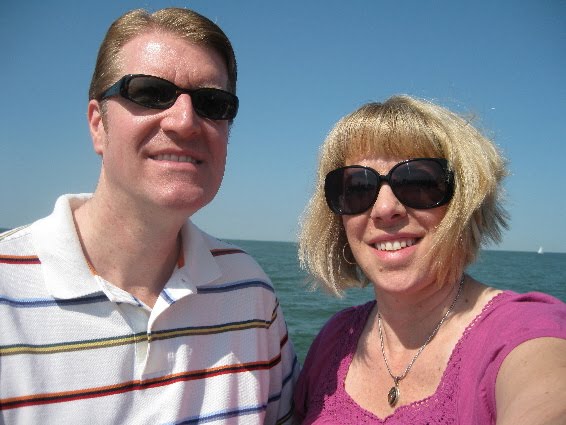
We drove about 1 1/2 hours west of home, parked the car and hopped a ferry like this for a 20 min ride to the island.  
 
Here we are getting wind blown on the ferry ride.  I hope you like photos of this sort.  It's pretty much the only kind I have of us.  You know, you hold the camera out as far as possible and hope for the best...lol.
We grabbed a cab and dropped our bags off at our Bed and Breakfast before heading into town.  We stayed at Drake's Get Away Inn.
There is a charming park in town down by the water and we took a few photos there...
Some fountain, I didn't see a name on it...


I made Rod stand by this tribute to some fallen soldiers...
Across the park was the Beer Barrel Saloon which boasts the longest bar in the world. 
This cute carousel that played traditional organ carnival music....

As we passed these sights we made our way to the Perry's Victory and Peace Memorial.  We were pretty hot and pooped, so we were really happy to watch a 15 min. educational movie about Oliver Hazard Perry in an air conditioned theatre.  Supposedly if Perry didn't win the Battle of Lake Erie, I would be Canadian.  
The monument itself was closed that day, but it represents the longest lasting peace between Canada, Britain
and the USA.  I like that.   
We needed some sustenance about now, so we walked back to The Boardwalk and had a lobster roll at the Upper Deck.  I wish I could be a good blogger and take photos of all the yummy food we ate.  I tell myself I will do that from now on, but the minute the food arrives I begin to chow down and totally forget.  You will just have to take my word for it when I say something was delish.

Completely rejuvenated we headed off for more sightseeing....
I forgot to take photos of the winery tour...You can read about the history here.  Amazing thing, they sell 90% of the wine they make on the island itself.  And they can't keep up with the demand.  Crazy.  If you like sweet wine, or Ohio wine, or young wine it's probably the place for you.  Me, not so much.

Then we went down in the cave. Pretty funny that they sold this as a "tour".  A viewing would be more accurate.  It was one small room at the bottom of a steep set of steps.
There are those big crystals...Here is another one of those fab photos of us that I mentioned.
Some more crystals as we turned around and walked up the same steps we came down on.  Yeah, the "tour" lasted about 3 min. total.  Pretty funny!  I guess this cave saved the family business during the prohibition.  They were selling tours back then to survive.  Now they sell tours to suckers like us :)
Me.  Happy to out of the cave :)
Later we ate some fish for dinner at Mossbacks.  I did manage to snap this photo of Rod's Black & Tan.  How perfect does this look?  I always love the separation and the beauty of the two colors together.
Here we are suffering through some really bad Karaoke. Cheeseburger in Paradise, Bad Romance, Bad Medicine....Thank goodness it was a beautiful summer night.
Can you believe that was all in one day?  We didn't waste any time.

The second day we headed over to Perry's Cave.  (There are a bunch of things named after that Perry guy on this island!)  Bizarre that there would be another cave to see too.  It's vacation, so whatever.  Another cave it is.
We decided to go for it, and bought the combo ticket.  For a reduced price we could do it all! The Butterfly House, Mini Golf, and Perry's Cave! The lady was really selling it hard...lol.  

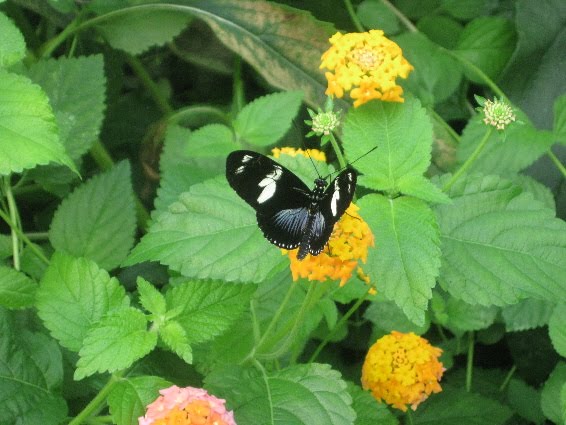
This butterfly thing ended up being totally worth it.  There were sooo many kinds, all flying free.  Really very cool.
This one was my favorite, the Common Blue Morpho. It was anything but common.   It looks like this when it has its wings closed...Beautiful right?
Here they are eating....
And this is what they look like when the wings are open!  The blue was spectacular!!!  Just. So. Cool.

I could have stayed in there for hours, if it wasn't a million degrees in the greenhouse!

On our walk over to the mini golf, I made Rod stand for a photo op.  Delirious from the heat, he'll do anything.
Too busy getting my butt kicked in Putt Putt, (called The War of 18 Holes) I forgot to take photos, so on to the next cave! 
This was a true cave, and at least it was a cool 50 degrees F.  As pretty as the crystals in the last cave were, this cave was its wet slime-y cousin.  It was so ugly and there was not much to see when we climbed down another set of very steep stairs.
See...
Yeah.  Here is our teen aged tour guide trying to tell us that this formation looks like a lion.  Whatever.
This is the contaminated lake...
And Rod, pretty excited he can't stand up straight down there.  I'm laughing all over again just writing this...
This tour actually lasted about 20 min. so I guess it qualified as real tour.  Not sure if that is a good or bad thing!

We were in need of some nourishment, so we went to The Goat (Isn't that a funny name?) for some perch tacos. Yum!  Whenever we are on vacation, one of our main goals is to eat outside whenever possible.  I think we managed to do that with every meal :)
On our walk back I snapped this photo of a sweet little church....

That was it, our mini break on Put In Bay was over.  I think we crammed in everything possible in those two days...Rod called it our "Appetizer Vacation."  He's looking forward to a week long vacation in the fall :)

Lastly, we stopped at a farm stand on the way home and picked up some, tomatoes, peaches and corn.  I was able to snap a photo of these sunflowers behind the little stand.
I love the happy faces of the sunflower.

Thanks for going along on the trip with me and I will be back with my usual posts of craftiness real soon!

Friday, August 20, 2010

Christmas Friends

Hey Everyone!

I have another holiday card using one of the new stamps from DRS Designs today.  I love images of snowmen (as long as they have hats...lol!) and this snowman and Santa stamp (Wintertime Buddies 362M) is just delightful! It's one of the new releases this month and the moment I saw it, I knew I wanted to pair it with the stamp Friends Make Season Special (300F)
To make this card I did the following:

Stamped the image.
Dry embossed part of the card over the image itself.
Stamped sentiment on smooth portion.
Stamped image on a separate piece of paper, colored and cut it out. 
Adhered it over embossed image with glue dots and added ric rack trim.

I just love how happy this card looks :)

Thanks for stopping by and to see all of the newly released stamps, stop by DRS Designs!

Challenges this card is linked to are as follows:
Crafty Ann's-Christmas in August
Craft Your Passion-Anything Goes

Details not listed above-Paper: The Paper Company, Markers: Copic, Ric Rack die: PTI

Thursday, August 19, 2010

Scary Pumpkins

Edit to add: There is a 40% off sale at Lindsay's Stamp Stuff today only!

Hi Friends!

Today is Lindsay's Stamp Stuff day on the ole blog-o, and my card was made using an image from her set Cute Halloween.  I must confess, I made this card back in the winter.  I was just bored and wanted to make something "just because".  If you make a Halloween card in the middle of February, it's definitely a just
 for the fun of crafting kind of thing...lol! 

Anyway, Rod has been taking some vacation days last week and this, so it was great to have something new  to post, without actually making anything...Love it when stuff works out like that. 
I like it that this image of the pumpkins have faces that are carved.  It let me color the the eyes yellow, so that it looks like light shining through them. I also roughed up the edges of my papers, I guess I was trying to add to the whole scary, halloween-y feel.

Here is a look at the entire set:


Well, that's it for me folks.  With Rod off of work, I have to make it quick, but be sure to check out Lindsay's blog (You can always count on a freebie from her!) and the rest of the design team too!


It's probably too early to say Happy Halloween, so just have a nice day. Thanks for the visit!

Details not listed above-Paper: The Paper Company, Reminisce, Markers: Copic, Bic Mark it, Ribbon from my supplies.
Related Posts with Thumbnails