Welcome!

My name, Karin, was pretty common when I was growing up...just not the spelling. Unless you are of German heritage like I am. So, I have spent my entire life answering the question, "What is your name"?... With, "Karin...with an "i"! Who knew it would come in handy all these years later when I went to name my blog.
Showing posts with label Thinking of You. Show all posts

Tuesday, August 29, 2023

On My Mind

 Hi Everyone,


I think my second favorite stamp after the Dogwood Branch is the Medium Daisy Bloom.  It's so versatile and just plain cheerful.  I use it all the time!

I made this card for a friend who's going through a hard time, and I took inspiration from this card here.  

The background was heat embossed and I added some glitter glue to the flower centers.  I die cut the Mind and Prayers Greeting and added another fussy cut daisy as embellishment. 


To find these and many more flower stamps, just click here!

Happy Stamping!
Karin


Tuesday, March 14, 2023

  Hi Everyone,

Here's a simple, flat easy to mail card that I made for a friend going through a hard time.  I used one of my favorite images from DRS Designs for a snail mail card, because it has the sentiment built right in.  

I stamped, colored and die cut the Happy Mail image and sentiment for the front and used the Medium Daisy Bloom to create a background to match.  


An embossed panel in a matching color anchored the image on the card.  

Thanks for stopping by the blog today!

Karin

Tuesday, August 9, 2022

Cheerful Smiles

Hi Everyone,

My card today is generic, one of those cards that you can you use as a birthday, friendship or thinking of you cards.  In my opinion, you can never have enough of these in your card stash.

While I know Dogwoods don't come in these colors, it's my favorite flower stamp from the DRS Designs store, and I thought it would work for a background colored up in these fresh, happy colors. 


I added a die cut sentiment from the Cheerful Smiles Get Well Greeting which was embellished with a piece of ribbon.   

The yellows and oranges are making me think about the next season....GAH! I'm not ready to say goodbye to summer, so I'm quickly squashing that thought. 

Enjoy the summer as long as you can folks!

Have a good one!
Karin 


Tuesday, August 3, 2021

Friendly Note

  Hi Everyone,

I was inspired by my cards in this post, to try stamping by masking off a portion of the main panel.  The last time, I masked off a section, and inked and stamped just between the two pieces of tape.  Here I used one piece of washi tape, and stamped my leaves and florals on either side.  I then removed the tape, and stamped  Friendly Note Greeting in the blank space, embellishing it with a couple of gems.


The stamps I used are as follows:

Silhouette Branch (stamped in green)

Puff Circle (stamped in pink)

Silhouette Leaf Branch (stamped in teal)

Thanks for stopping by!

Karin


Tuesday, June 15, 2021

A Friendly Note and Father's Day

                                                                           Hi Everyone,


I have a couple of cards to share today, one for a friend and one for the dads.

I chose the Happy Mail image to pair up with the new Friendly Note Greeting, because the flower is cute and friendly!  The image comes with the words thinking of you on it, so I just masked them off, inked up the stamp and then removed the tape before stamping it, so that only the image remained. 

The card base and the yellow layer were stamped using the Puff Circle, and the orange layer was dry embossed.  My die cut grass was stamped using the Easy Grass Background and it was attached at the end of assembly along with the greeting.


This one is for all the golfing dads out there, and that includes mine!  

The background was made using an embossing folder and the Everything Golf Background.  I covered up the seam between the two papers with a strip of black cardstock and embellished it with a couple of metal brads.  I used the Especially Fore You Greeting and attached it to the card base.  For the image, I stamped and heat embossed the Silhouette Male Golfer, and used some post it notes to mask off the background, as I added ink to create the grass and sunrise.


Thanks for visiting the blog and visit DRS Designs for all of these stamps and more! 

 For those celebrating, have a happy Father's Day!  And for those who are missing someone, may the day land gently for you.  

Hugs,
Karin


Tuesday, February 23, 2021

Happy Thoughts

 Hi Everyone,


I'm showing off the new Arched Window stamp on my first card today.  It's so cold and snowy here, I needed to make a pleasant scene to warm me up...I'm dreaming of the sunny, cheerful days to come.

I stamped the window a few times and fussy cut out the first one.  I made a mask out of the second one, and fussy cut the shutters on the third one. I then colored and attached those shutters to the back of the window shutters, so that they could be folded shut.  I hope that makes sense.

The background was made using The Floor stamp and an embossed brick wall. I also stamped and fussy cut the Cattail Milk Pail and the One Line Happy Thoughts Greeting.


Here you can see what the window looks like opened up.  I used the mask I made for the window as a helper to stamp the tree top and the hot air balloon.

The tree and balloon come from the following stamps:


For my St. Patrick's Day card I stamped and heat embossed the new Shamrock of Shamrocks using gold embossing powder.  I stamped the bottom using the Small Shamrock Group and the made the greeting using the Tiny St. Pat's Day


Please send me some Irish luck to chase away the snowflakes! 

Happy Stamping!
Karin


Tuesday, May 12, 2020

Follow Your Heart

Hi Everyone,

Who among us hasn't felt like the odd one of the group, right?  Well I just love this new sentiment which gives all of us permission to be ourselves :)

I began by stamping the School of Fish (W1038E), and coloring them up.   I dry embossed the wave background, and then cut a portion out of the middle for the fish to fit in between.


Stamping and die cutting the new Go with the Flow Follow Your Heart Greeting (W1049E), I attached that to the bottom of the card. To match the sentiment, I added the fish and coral from the 3 in 1 Ocean Floor (W1040H) which were fussy cut.

To finish off the card, I added a few punched hearts as bubbles.

For this card I used the same stamps, but made an underwater scene.

I stamped the Porthole (W1039L) twice, fussy cutting one to use as a mask for stamping the scene outside.  I sponged on some ink and then stamped the coral and seaweed using the 3 in 1 again.  I was afraid I wouldn't have room for the fish, so I ended up stamping and fussy cutting him to add separately.   

Using the Woodgrain stamp I created the background, wrapped it with a piece of twine and used the same sentiment for the greeting.  

Be sure to stop on over to DRS Designs....They will fulfill all your stamping needs and desires during this stay at home time!

Have a great day :)
Karin


Tuesday, July 9, 2019

Twins

Hi Everyone,

What's better than Leonard Pig flying a kite?  Why, two Leonards of course!  He was the perfect image for an easy breezy summertime card :)

I stamped him twice and then added a couple of extra kites from the 4 in 1 In the Sky stamp.  After die cutting the image, I added some string to the two other kites to make it look like they were being flown from outside the frame.  


An embossed background and some ribbon were attached to the card base and I chose the punny Missing You Pig Time Greeting to finish it off.

 Check out DRS Designs for all of these stamps and so much more!

Hoping your day is a easy and breezy as this card! 
Karin

Tuesday, March 26, 2019

Extra Tweet

Hi Everyone,

I still had a piece of yellow cardstock sitting out on my craft table from last weeks card, so along with color inspiration, I took layout inspiration from that card too.

I stamped and colored up the Silly Bird four times, using my 1 1/4" square punch at an angle a couple of times.  I wanted to add to the playfulness of the whimsical, Extra Tweet Day Greeting. I just love this bird stamp :)


Everything was attached to a background made with the Feathers Three in One stamp. How's that for easy?  Well, not as easy as this next CAS card...
  

I used an embossed background, my bird punch and the following stamps:

Be sure to check out DRS Designs for all of these stamps and so much more! 

Have a great day!

Karin


Tuesday, March 12, 2019

Birdies

Hi Everyone,

I'm itching for Spring to arrive, so with that in mind, I have a couple of bird themed cards to share again this week.

I wanted to use the new Thinking of You Tweetie Greeting, so I looked through my bird themed stamps from the current catalog at DRS Designs. 
1. First I stamped the Lovebirds Branch. 
2. I stamped the Birdhouse Tree Branch below it.  That left a blank spot in the left corner, so I inked up the tip and stamped it again.
3. Lastly I stamped the Bird Bath.

I colored in all of my stamping using Copic markers and then created my sky using a sponge and a scalloped circle that was punched out.  Just keep moving the circle and inking over it,  to create the billowy clouds.  I masked off a portion of the bottom and sponged on some green ink for the grass. 


After attaching a piece of die cut grass along the bottom, I found I had no room for the sentiment as it was, so I cut it into pieces and attached it with some dimensional foam tape.

This second card is very clean and simple, using only the Open Leaf Branch and the Extra Tweet Day Greeting. 


I colored in the tree, adding some glitter glue for sparkle.  I embossed a die cut frame and added a die cut bird to finish it off. 

The calendar is telling me spring is around the corner, so I hope the warm temperatures are as well!

Thanks for visiting today!
Karin

Tuesday, June 26, 2018

Beach Themed Cards

Hi Everyone,

With summer upon us now, I have a couple of beach themed cards to share with you today.  I have friends that left for a beach vacation, so I definitely had them in mind while I was crafting over the weekend.  

I stamped and colored up the Brush Beach Sunrise scene using my Copic markers and framed it using my rectangle and scalloped rectangle dies.  I attached the "photo" to a background that was created with embossed waves and the Splatter Background stamp. 

The Snorkel Frog was colored, fussy cut and added with some dimensional foam tape, along with the Picture Perfect Day greeting to finish it off. 

My second card is one of those cards that I like to keep in my stash.  An all occasion note card that's perfect for summer time, and one that you can use as a thank you or thinking of you card, when you're short on time.  


I stamped the background using the Script Font Background stamp, and added a strip of iridescent foil tape.  I stamped 3 of the shells from the 4 in 1 Seashell stamp, using a couple of square punches to mat them.  All that was left to do was add the 1 Line Just a Note greeting.  

Thanks for stopping by!
  Have a happy day....
Karin

Tuesday, June 19, 2018

It's Five O'clock

Hi Everyone, 

Margaritas anyone? They're a party in a glass for sure!  

I had some green cardstock sitting out on my table, so instead of cleaning up, I decided to make a card using a citrus theme.  I created my backgrounds using the Citrus Slice and 
Silhouette Branch Background from DRS Designs in green ink, and added and embossed strip to cover up the seam.

Nothing is more celebratory than fruity drinks and friends, so I stamped, die cut and matted the
 Five O'clock Somewhere Greeting and attached it to the center of the card. 

I added the Margarita Glass that I colored and fussy cut, along with my die cut limes for embellishment.  And I didn't forget to add salt to the rim, by way of glitter glue :)

Here is a peek at the inside, where I just used the same stamps and the A Toast To You Greeting 


Cheers to You!  Hope your summer is going well and...
 Happy Stamping!

Karin

Tuesday, June 5, 2018

Happy Mail

Hi Everyone,

I have a couple of cards to share with you today that really aren't related to each other in any way, other than that I used some circle dies to create them both.

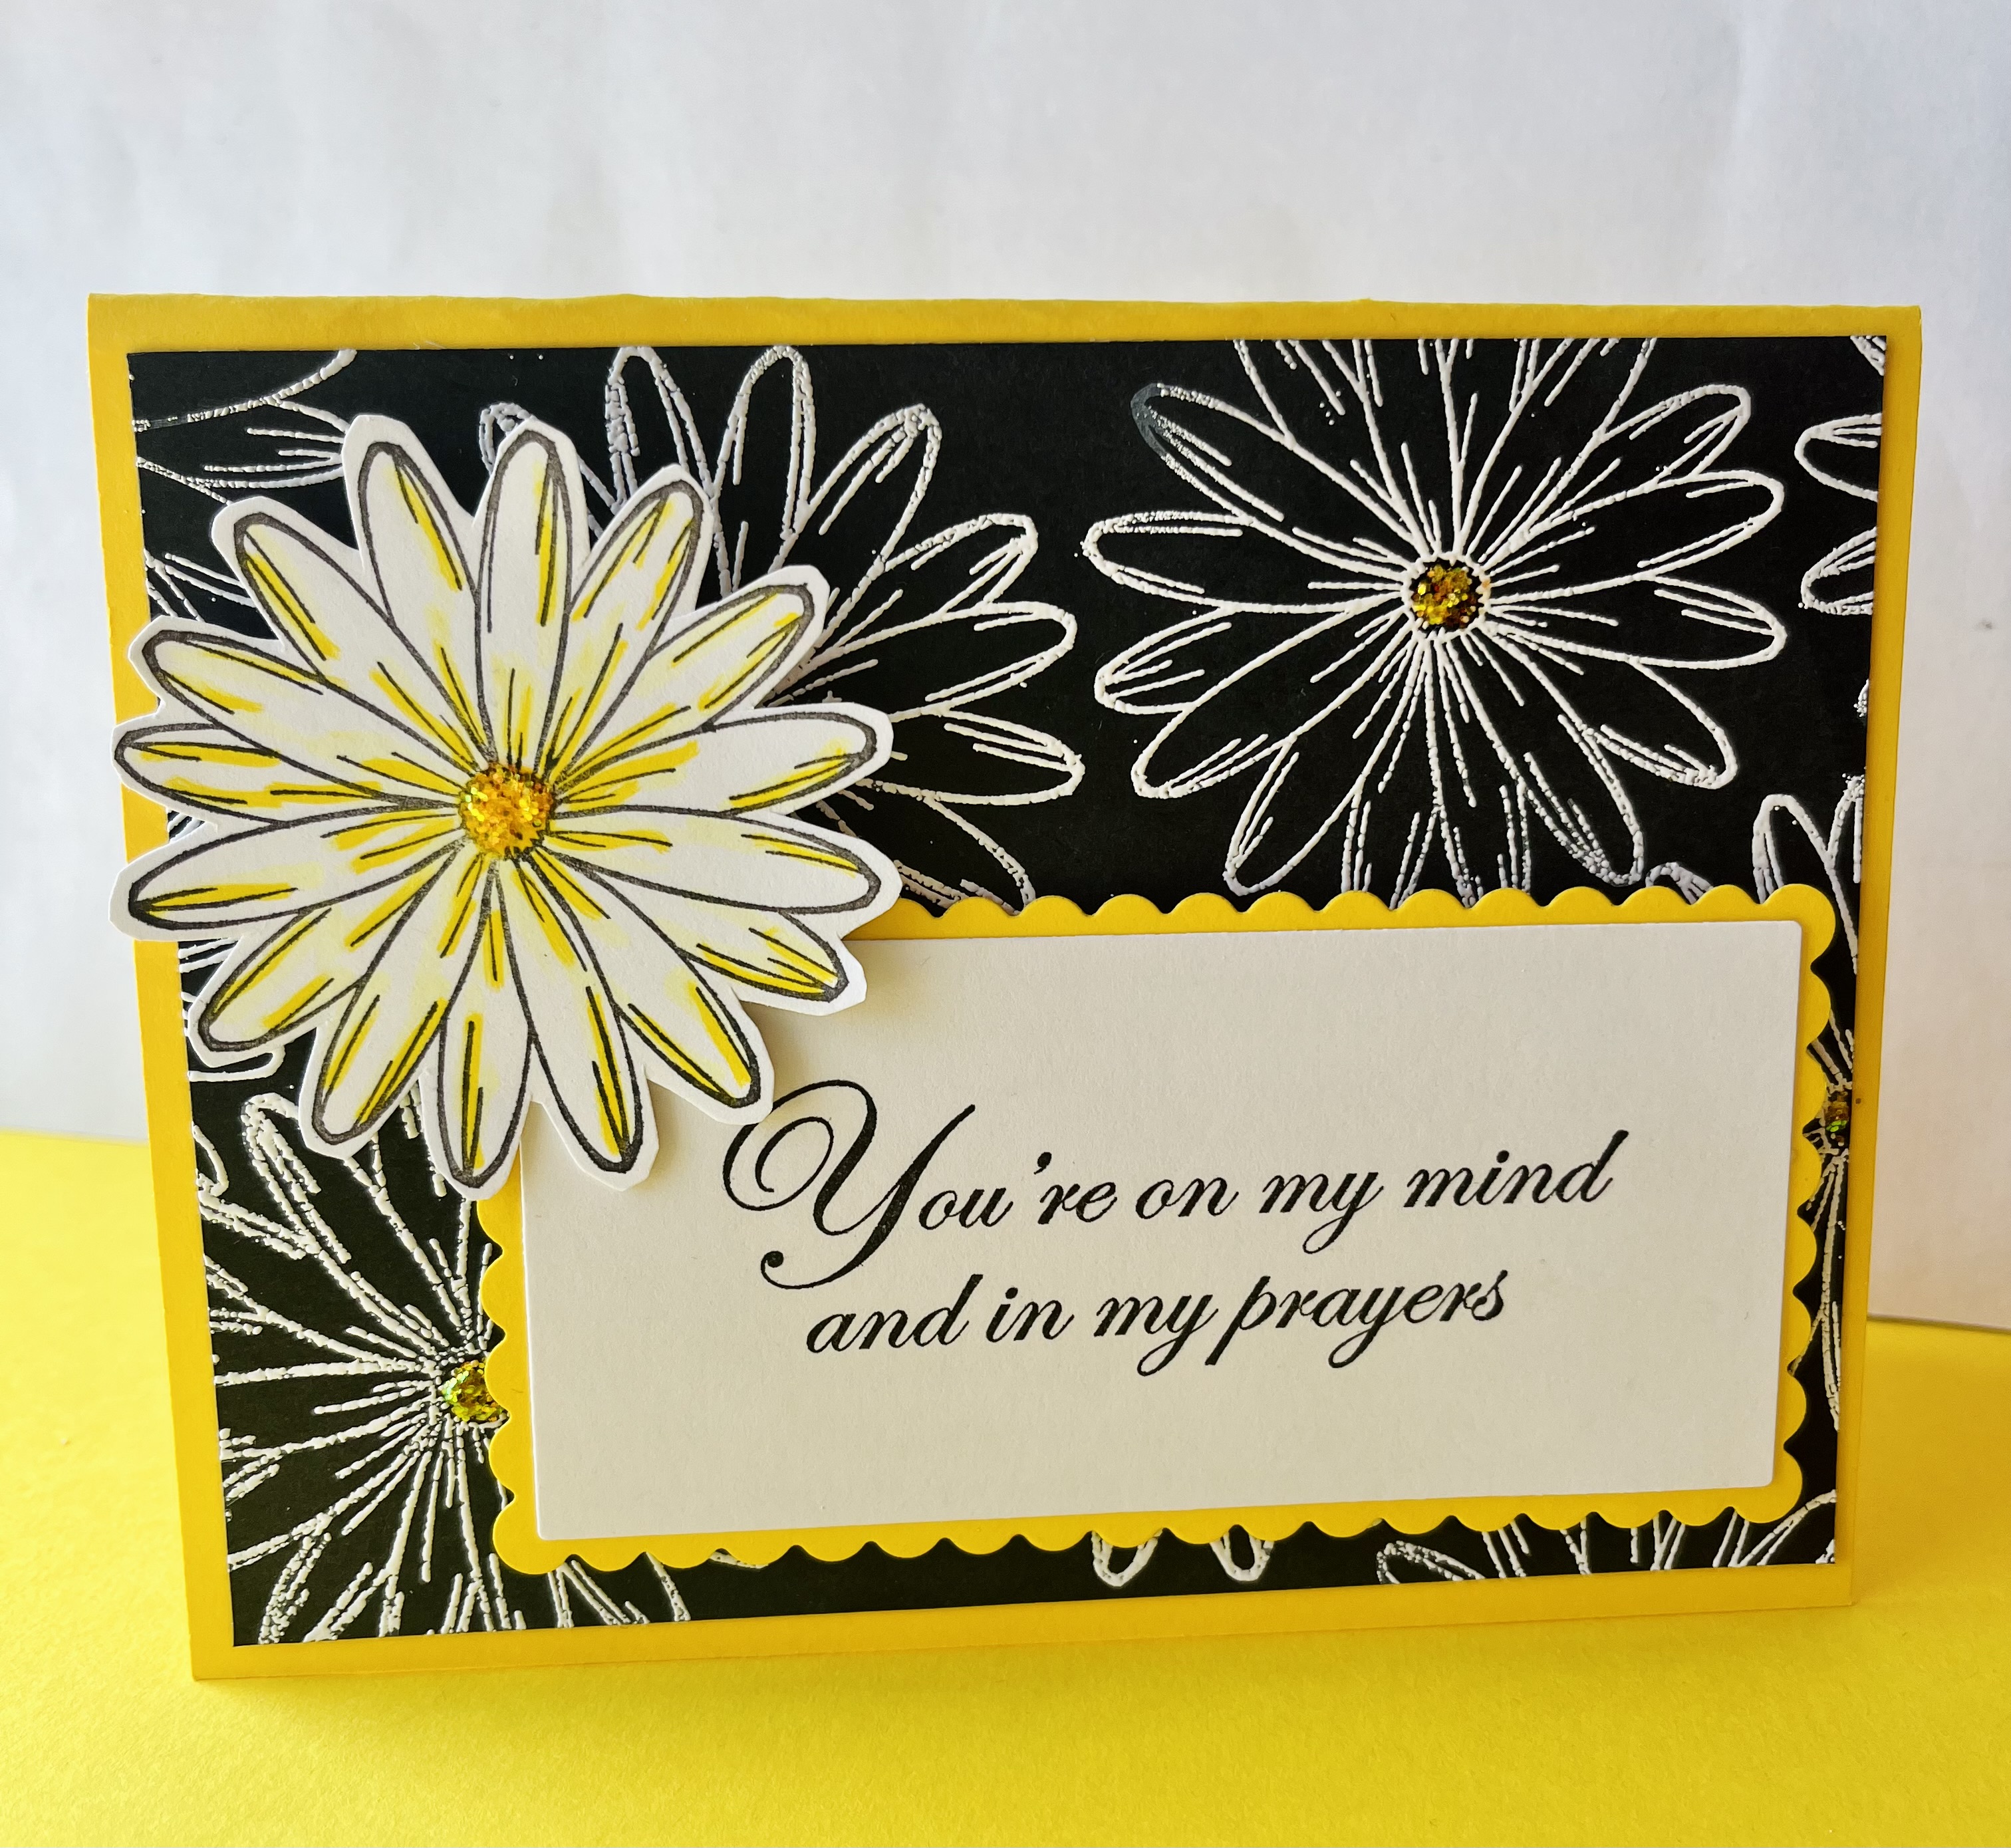
I wanted to makes something other than an ordinary card, so I went with an easy Z Fold card.  You start by folding the paper in half, like for a regular A2 sized card, but then you fold the top portion in half again.  You can then decorate the inside panel and the half panel, adding an image that you only attach to the half panel side.  


I used the Happy Mail stamp from DRS Designs for my image and the following 2 stamps to create my background paper:
Silhouette Branch Background (stamped in green ink)
Splatter Background (stamped in red and turquoise ink)

Here is a photo of the half fold...


And a photo of the card laying open.  I added a blank circle to the inside for a hand written message.


Since Memorial Day has come and gone, and summer is now unofficially under way, I thought I would turn to making something patriotic for my second card.   I began by embossing a neutral background with a star embossing folder (Darice brand) and I die cut some circles out of red, white and blue paper.  I stamped them using the Interlocking Star Background in red and blue ink, but I didn't have a greeting that would fit my small circle.  


I was too impatient to try and ink up the Let Freedom Ring sentiment and stamp it word for word in the circle, so I stamped it once and cut out the words and glued them down.  I attached my colored circles,  tied on a ribbon and added the greeting using some dimensional foam tape.  I looked at it, and decided it needed something else, so I added a few matching stars that punched out from my scraps.  

Thanks for stopping by today!
Karin


Related Posts with Thumbnails