Welcome!

My name, Karin, was pretty common when I was growing up...just not the spelling. Unless you are of German heritage like I am. So, I have spent my entire life answering the question, "What is your name"?... With, "Karin...with an "i"! Who knew it would come in handy all these years later when I went to name my blog.

Tuesday, October 2, 2018

Unexpected

Hi Everyone,

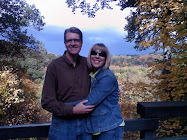
As soon as I saw the new Scary Skull stamp that was recently released at DRS Designs, my thoughts turned to a photo I took on vacation in San Diego.  I think it was somewhere in Temecula/the southern California wine country, that I snapped this:


I knew I wanted to take inspiration from it for my card...My teammate Nancy had the same thought, and made a fantastic Day of the Dead card in this post here.  I decide to go the colorful route, and stamped, fussy cut and decorated my skulls using these stamps and my own doodles:


I wrapped my embossed background with some printed ribbon and added the new 

I had originally made three skulls for the front, but what I had in mind didn't work out, (Plan A never works out for me!), so I brought the extra skull to the inside.


I finished it off using the new Deco Happy Halloween stamp and the Scroll Corner Tile stamp again. 

Spooky greetings to you and yours...
Have a great day!
Karin

Tuesday, September 25, 2018

Halloweend

Hi Everyone,

Our weather has finally taken a turn...Why does 65 degrees in the fall, feel so much cooler than 65 degrees in the spring?  It must be the inevitability of winter, but I don't want to get ahead of myself.  After all, this is a post about Halloween cards!

This first card is on the spooky side, featuring a scene made with the new Iron Fence and Gate stamp.
I sponged the background using my ink pads, and then stamped the images on top. I left the sky area kind of blank, and added some more sponging after I stamped the Raven.  I colored it in with Copic markers and then filled the sky using the Accent Bats stamp.   I die cut the background scene using a Sizzix die and finished off the card using the new It's a Scream Halloween Greeting.


Here's a friendly Halloween card for my second share today.  I embossed the background with a spider web embossing folder, embellishing the raised web with some glitter glue. I stamped, colored and fussy cut the new Ghost Boo, cutting out one extra ghost. 


Once my background was dry, I attached a die cut banner that had my extra ghost attached, and attached my greeting up top.

Be sure to stop by the DRS Designs store to see all of these new stamps and many more, all celebrating the fun of Halloween!

Have a great day!
Karin


Tuesday, September 18, 2018

Drink Up Witches

Hi Everyone,

I've got a sneak peek for you today!  DRS Designs has some super fun new Halloween stamps coming your way this week, and for today's card share,  I've paired one of them up with a few stamps from the current catalog.

The Drink Up Witches (721G) stamp is one of the newbies, and I stamped, colored and die cut it out, adding a black mat. I did the same thing using the Witch Feet stamp and set them aside while I embossed the background using a grapes embossing folder (Darice).  Since DRS Designs also has a 
Bunch of Grapes stamp, I stamped and colored up a strip that I bordered with some drippy green goo.  


I assembled the card and added some glitter to the drink and embellished the buckle on the witch hat using a gold gel pen. 

I carried the beverage theme to the inside of the card simply by using these two stamps:


Be sure to stop by the store for all the new releases on September 19th!  The Halloween season is upon us, so feel free to bust open that candy and start stamping :)

Have a great day!
Karin

Tuesday, September 11, 2018

Fall is in the Air

Hi Everyone,

Boy did we experience a soaker of weekend. I didn't love the buckets of rain, but the cooler temperatures put me in a fall mood for sure.  

This first card was made in with my friend in mind.  She's moving to Minnesota for her job next month, so I thought the Barn Door would make a perfect fall new home card.  I stamped and fussy cut the door on Kraft cardstock, adding some color using Copic marker.  I also cut a sliver of black paper, to create a rail for the door to "slide" on. (It doesn't really slide... I did think about trying to make it do that, but couldn't really figure that out...lol!)

I attached it to and embossed leaf background embellishing the door with a sunflower spray, which was cut from the Sunflower Hurricane Candle stamp. 


I added the strip of sunflower ribbon to anchor the One Line Welcome Greeting that was die cut and sponged with green ink.

Did you know that DRS Designs has birthday greetings for every month of the year?  My cousin has a birthday this month, so I thought making a fall themed card using the September Birthday Greeting was the way to go.  I've mentioned in the past that I'm notoriously bad about cleaning up between my card making, so I had the negative portion of a die cut leaf sitting out on my table from last week.  I chose to use it as a stencil and made the leaf by sponging on red, orange and yellow ink.  I added the same ink to my greeting, along with a couple of smaller die cut leaves. 


To finish it off, I rounded all of the corners of my card and added a few matching half pearls.  

Thanks for visiting today!
Karin


Tuesday, September 4, 2018

Evolution of a Card

Hi Everyone,

Once the calendar changes to September, and there being back to school, football and the ubiquitous pumpkin spice, I quickly fall into line and want all things to be autumnal.  Including my cards.  I pulled out my fall stamps and tried to get creative.

 It all began with my stamps from DRS Designs...

I die cut a leaf out of a die cut square, replacing that big leaf with a leaf that was stamped using the Medium Silhouette Leaf in various fall colors.  I added the Small Autumn Greetings to the leaf and set it aside as I worked on the background. Using the same stamp pads, I made a splatter background using a wet paint brush, and added a die cut vine and pumpkin.  I wrapped that background with a gauzy orange ribbon and assembled it, attaching the leaf panel I made using some dimensional foam tape.


I thought it was too hard to read the greeting among the busy leaves and I wasn't sure about the gold, so I die cut another square.  I stamped that, keeping more white space and made sure I stamped the most pale leaf in the center, leaving a spot to put my greeting there.  


It was still too hard to read the greeting, so out came my square punches, and this is what I finally ended on:


It's not the super creative, out of the box masterpiece that I had visions of in my head, but then rarely do my cards end up that way anyhow...lol!   I keep looking at that first card, trying to figure out if I could have maybe changed the frame color, or placement of the greeting, or...?  Oh well, that's the creative process and frankly part of fun of card making.

Thanks for stopping by the blog...

Wishing you all things inky and stamp-y!

Karin


Tuesday, August 21, 2018

Cowboy Hats

Hi Everyone,

I purchased a few new to me embossing folders a while ago, and these western inspired stamps have finally allowed me to use them.  I colored up the Cowboy Cactus image and matched that up with my cactus embossing folder.  The bandana in the image could easily have a paisley pattern, so I made an extra background panel and embossed that too.  


Since the cactus was festooned with assorted cowboy garb, I decided to interpret it,  that the partyers discarded their stuff any which place on their way home :)  I inked up the end portion of the 
Saddle Up Birthday Greeting and used a speech bubble to add to the whimsical nature of the card.  

And I used the beginning birthday part inside, along with the Yee Haw from the 
Western Word Square, adding a couple of saddles and spurs from the 4 in 1 Cowboy Gear.  


I wanted to highlight some of the great phrases on the Western Word Square, so I selectively inked up a few and layered them up using my circle punches. It needed a cowboy element, so I chose to stamp the hat, and added all of them to an embossed mustache background.  


A punched star border was added to anchor the elements and fill in the space along the bottom of the card. 

Yee Haw!  Thanks for stopping by today!
Smiles and Hugs!
Karin  

Tuesday, August 14, 2018

Side By Side

Hi Everyone,

I hope you've been enjoying seeing all of the western/cowboy cards here on the blog, because I've enjoyed stamping and making them.  Even when things haven't gone as planned :)  

I wanted to stamp the Cowgirl Line Dancer and Cowboy Line Dancer close together, so I stamped her first and then made a mask, covering her up and stamping him slightly on top.  Something didn't go right, so I tried again.  I changed up their position slightly and managed to not like the outcome again.  Sigh.  Never mind.  Instead of starting over with a new idea, I decided to used the top part of the couple only and made the following cards.  

I chose an anniversary theme for this couple, stamping and layering up the Love is More Precious Greeting.  I dry embossed the background and added a piece of cardstock stamped using the Woodgrain Background stamp. 


I added a glittered up sunflower that was fussy cut from the
Polka Dot Flower Trio, just as an embellishment.

For this card, I used a circle punch on my couple, and stamped the background using the
 Western Word Square, adding a strip of embossed cardstock and a strip of glitter.  


I inked up the Howdy Pardner from the background stamp and used a speech bubble punch to make a greeting.  After completing these, I was so happy I was able to rescue my couples and make them into worthy cards.  

Thanks for stopping by!
Karin


Tuesday, August 7, 2018

Cowboy Boots

Hi Everyone,

I'm loving these new stamps that DRS Designs has recently released!  All of them are just super fun, and using them, one can make cards that are both masculine and feminine.

I started off making a masculine card, by adding ink to my embossing folder and making a rustic woodgrain like background.  I added a strip of patterned paper made from the Western Word Square and attached it along with a punched border to the bottom of the card.  

Stamping the boot and hats, I changed direction and wanted my card to be more girl like, so I embellished the designs of the images with glitter after coloring the details red.  


Because of that red choice, I went with red for my base and also for the mats on my sentiment and image, which were attached with dimensional foam tape.

Here is a list of all the stamps used on today's card:

Thanks for stopping by!
Related Posts with Thumbnails